Anna at Eternal Maker had some wonderful Nani Iro plush jersey in teal and grey that has a soft and luxurious texture not unlike devore velvet and whipped up a quick Möbius style scarf. So Anna put together a kit and I said I would write a quick tutorial.

You will need:
Double Gauze (110cm wide) 30cm length - cut in half along the width to make two pieces 15cm x 110cm.
Nani Iro Plush Jersey (65cm Width) 30cm length - cut in half along the width to make two pieces 15cm x 65cm.
(These fabrics are available as a kit from Eternal Maker in two colour ways- teal/navy or grey/plum)
(These fabrics are available as a kit from Eternal Maker in two colour ways- teal/navy or grey/plum)
1 x Ballpoint sewing machine needle size 70
Gutermman sew all Polyester Thread-
Two different colour removable fabric markers e.g. chalk pencils. The two colours will be known as A and B in the tutorial.
Finished scarf size: 13cm/5" wide x 136cm/53.5" long in a continuous loop.
Two different colour removable fabric markers e.g. chalk pencils. The two colours will be known as A and B in the tutorial.
Finished scarf size: 13cm/5" wide x 136cm/53.5" long in a continuous loop.
1. Join the two plush jersey fabric strips together at the short ends to make one long strip. Use the selvedges to make the seam allowance. Seam allowance should be around 1cm/3/8" wide depending on selvedge width. Press seam open.


2. Join the two double gauze strip together at the short ends to make one long strip. Use the selvedges to make the seam allowance. Seam allowance should be around 1.5cm/⅝" wide depending on selvedge width. Press seam open.
3. Place the two strips right sides together aligning the short edges at one end: the double gauze strip will be a lot longer than the jersey. Pin together along the long edges. Trim off the double gauze strip so it is the same length as the jersey strip. Save the left over double gauze for another project!
4. On the top edge of the strips, sew a seam along the top long edges securing with back stitches at the start and end of the seam and using a ⅜"/1cm seam allowance. At the lower edge, sew two seams with a 13cm/5" gap between them following the diagram below for the precise seam placement.

TIP: Use a walking foot and a long stitch (3mm) to sew the fabrics together. The plush jersey is quite thick and springy to sew compared to the double gauze and both the walking foot and longer stitch length make the sewing process easier! Optional: Trim the edges of the double gauze edges with pinking shears as they fray easily.
5. Make a mark in removable fabric marker (A) in the seam allowance at each end of the top edge. Make a mark in a different colour removable fabric marker (B) in the seam allowance at each end of the lower edge. This makes an open-ended tube with a gap at either end plus a 13cm/5" gap on one long side which will be used for the turning through. I used yellow chalk at each end of the long top seam and white chalk on the bottom seam.

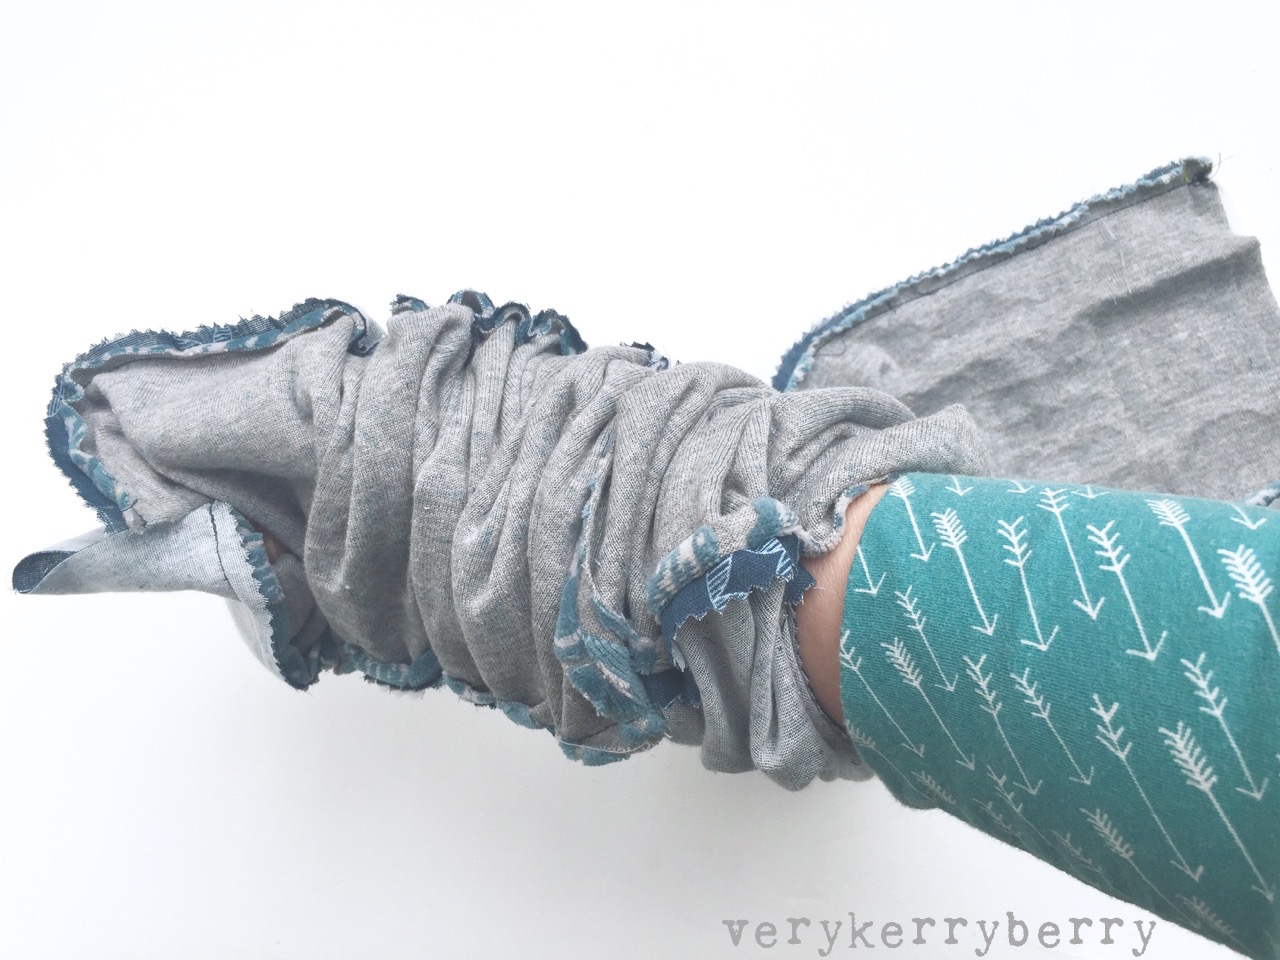
6. Reach inside the 13cm/5" gap and pass your hand all the way down to the furthest end of the scarf. Grab the end and pull it into the tube and out of the 13cm/5" gap - it will be right side out as it comes out .


7. On the end which is right side out, holding the mark made with fabric marker A and feed the end of the scarf back though the 13cm/5" gap and towards the short side so that it meets the mark made with fabric marker B on the other end of the scarf. Pin together, making sure the seams are open Repeat with the remaining marks. You should now have a wrong side out tube with the short edges pinned together. Sew the edges together using a 1cm/⅜" seam allowance. If you have a free arm sewing machine you can carefully fit the pinned tube over the free arm. If don't have a free arm machine, sew on the inside of the tube, carefully working your way around it.

8. Reach inside the 13cm/5" gap and pull out the short joined section of the scarf so it is now all right side out. You should have a loop with a single twist. Join the gap using slip stitch or ladder stitch. You can now wear your scarf!


VARIATION: Loop Scarf
As an alternative, for a loop scarf with no twist join the short edges together in the same way but matching the same colour marks at the seams.
You can find other kits at Eternal Maker here. The Whatever the Weather Doll Play Quilt Bundle particularly caught my eye, as did the Cotton+Steel needle roll- great gift for knitters!
3. Place the two strips right sides together aligning the short edges at one end: the double gauze strip will be a lot longer than the jersey. Pin together along the long edges. Trim off the double gauze strip so it is the same length as the jersey strip. Save the left over double gauze for another project!
4. On the top edge of the strips, sew a seam along the top long edges securing with back stitches at the start and end of the seam and using a ⅜"/1cm seam allowance. At the lower edge, sew two seams with a 13cm/5" gap between them following the diagram below for the precise seam placement.

5. Make a mark in removable fabric marker (A) in the seam allowance at each end of the top edge. Make a mark in a different colour removable fabric marker (B) in the seam allowance at each end of the lower edge. This makes an open-ended tube with a gap at either end plus a 13cm/5" gap on one long side which will be used for the turning through. I used yellow chalk at each end of the long top seam and white chalk on the bottom seam.

There will still be a shorter part of the scarf that is wrong side out.


8. Reach inside the 13cm/5" gap and pull out the short joined section of the scarf so it is now all right side out. You should have a loop with a single twist. Join the gap using slip stitch or ladder stitch. You can now wear your scarf!


VARIATION: Loop Scarf
As an alternative, for a loop scarf with no twist join the short edges together in the same way but matching the same colour marks at the seams.
You can find other kits at Eternal Maker here. The Whatever the Weather Doll Play Quilt Bundle particularly caught my eye, as did the Cotton+Steel needle roll- great gift for knitters!

That is awesome!! Great instructions, I won't even need to check out a video. And how gorgeous is that plush jersey?!
ReplyDeleteThat is awesome!! Great instructions, I won't even need to check out a video. And how gorgeous is that plush jersey?!
ReplyDeleteNice one! I like your use of the Nani Iro Jersey - it looks like a gorgeous fabric.
ReplyDelete